


| Part | Source |
|---|---|
| LM317 Regulator | Glitchbuster |
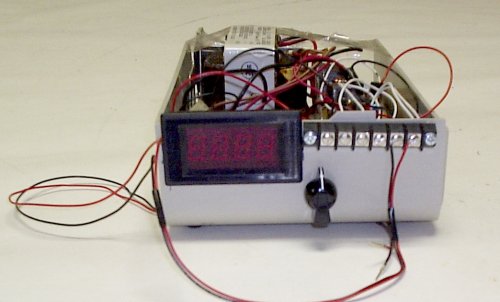
| 200V Meter readout | coldfusionX store on eBay |
| 6 pos Terminal Strip, Knob, Potentiometer | Austin Electronics |
| 5V Power Supply | Old Inkjet Printer |
| Transformer | Old Dot Matrix Printer |
| Big 470uf caps, 3A Rectifier diodes | Dead PC power supply |
| 3 pos Terminal strips, breadboard | Local Radio Shack |
| Plastic Case | Old Photocopier case modified with Table Saw. |
Someone suggested that if I wanted to make robots cheaply to get some old printers and take them apart for the parts inside. So far I haven't made any robots from these parts, but I have been able to recycle the parts for my own projects. For example, I have been using a power supply out of a printer to supply 5V power. I've wanted to put it in a case and add an adjustable output for testing motors and other circuits other than 5V logic.
I learned quite a bit about electronics in the course of the past six months or so. I put together a simple adjustible power supply circuit based on the LM317 datasheet (look it up on Digikey). I used a 10K ohm resistor from the output to the Adjust pin and a 100K ohm potentiometer to adjust the output.
Another important thing I learned that you can make really neat sparks and ruin the leads on your multimeter by trying to read current across ground to 120VAC. You will notice that there is some strategically placed packing tape over the back of the unit to guard against accidental fireworks.
The LED voltage meter was a $10 item I found on eBay. ColdfusionX has some interesting stuff, but be warned, none of his items come with usable instructions.
Here are some things I'd like to do in the future to enhance the power supply:

